Why Your Bagpipe Reed Is Never Quite Perfect
Feb 16, 2026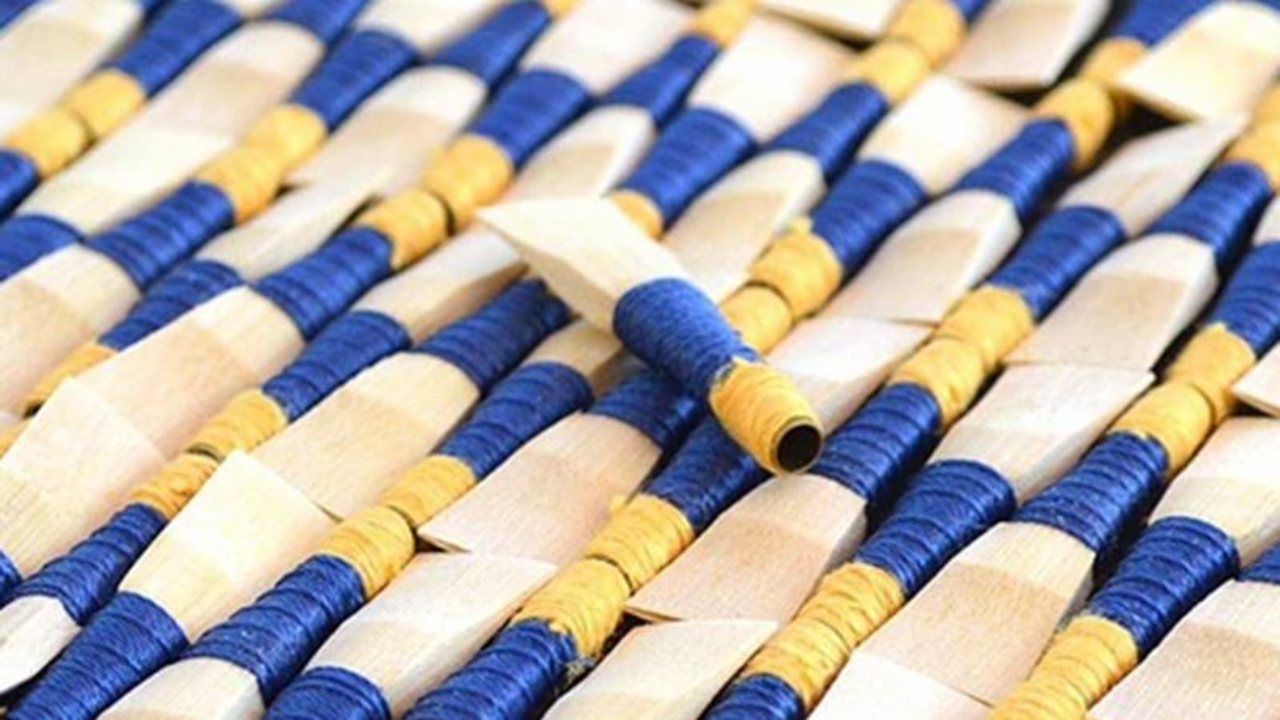
If you’ve ever wondered why one reed feels like magic and the next feels like a fight... welcome to the wonderful world of reed making.
It’s not mysterious because makers are hiding secrets. It’s mysterious because it’s hard. Really hard.
Unlike most areas of piping, reed making isn’t something you can just sign up to learn.
Master reed maker Adrian Melvin learned his craft from a Dutch engineer in Australia who had reverse-engineered the techniques of legendary makers like McAllister and Warnock. That's how it works in this world: you find someone willing to share, you invest in custom machinery, and you spend years refining your process.
There’s no standardized curriculum or neat instruction manual. Knowledge gets passed along through chance meetings, apprenticeships, and years of trial and error, finding someone willing to share, investing in specialized tools, and spending years refining tiny variables that most players will never see.
And even then, the reed is never quite perfect.
The Tyranny of Cane
Every bagpipe reed starts as Arundo donax, a bamboo-like cane grown in a narrow Mediterranean region between southern France and northern Spain. That’s the ideal growing area, but “ideal” doesn’t mean “consistent.”
By the time a reed maker receives a tube of cane, it was harvested four or five years earlier – and the weather that year, the soil conditions, the time of harvest, the curing process; all of it affects how that cane will behave.
When a batch arrives, 15–20% is usually rejected before the work even begins, because it's too soft, too hard, too curved, or too blemished.
And unfortunately, this part of the process is pretty unforgiving. If the cane is good, you can almost make the reed with your eyes closed and it will sing. If the cane is stubborn, no amount of craftsmanship can completely rescue it.
The material always has the final say.
From Tube to Triangle: The Reed-Making Process
Creating a reed begins with splitting a cane tube into four or five pieces, depending on diameter. Each piece gets processed to remove the soft inner pith and some of the hard outer bark. You're searching for the "sweet spot" in between – the zone that's rigid enough to be strong but flexible enough to vibrate freely.
One of the most critical steps is gouging a curve into the inside of each blade. That curve forms the sound box. Without it, the two blades would simply crack when tied together around the staple.
Speaking of staples – that little metal tube inside the reed matters more than most players realize.
-
Brass staples tend to produce a punchier, more powerful sound, but may require extra tape on the high hand to balance the scale. They're made from solid tubing, with one end opened up and the other crushed into an eye shape.
-
Copper staples often yield a slightly mellower tone and can create a naturally balanced scale because of their tapered shape. They start as flat trapezoidal sheets that get folded and crimped. Because the trapezoid has different widths at each end, the finished staple naturally tapers like a Christmas tree – matching the triangular geometry that runs through all bagpipe design.
After shaping the blades and thinning the tips, the cane is lightly wetted to make it pliable. Then the tying process begins. The two blades are wrapped onto the staple with waxed thread, carefully coaxed into closing evenly at the sides.
Strong cane resists closure. It may need repeated adjustment before it settles.
The Race Against Hardening
As soon as bark is removed, the cane begins to harden.
For a week or two, the exposed material reacts to air and firms up. Eventually it stabilizes, but predicting exactly where it will land is part science, part experience.
This is why a reed that felt great yesterday might feel stronger tomorrow.
It’s also why reed makers test every reed before shipping, and why surprises still happen. You can make six identical reeds in a row, and the seventh suddenly produces a double tone or sits at a slightly different pitch.
That’s not sloppiness. That’s just the beautiful, frustrating imperfection of nature at play.
Saving "Bad" Reeds With the “McAllister Wiggle”
Before you toss a reed that feels too hard or too open, there’s a classic technique taught by the legendary Joe McAllister that's worth trying.
Grip the reed just above the hemp and gently flex it side to side, working your way around the circumference. You're trying to get the binding area to move just slightly – you should feel a subtle flex in the cane.
What you're doing is training the reed to seat properly on the staple and encouraging the mouth opening to close to a more functional size.
Sometimes a reed that appears wide open overnight just hasn't settled onto the tube correctly. A few gentle wiggles can transform an unplayable reed into something exceptional.
This technique works because good reeds often come from strong pieces of cane that naturally want to spring open. By training the reed to close down through repeated gentle flexing and pinching over several days, you're creating a smaller mouth opening.
A wide-open mouth produces flat pitch, dull tone, and poor scale balance.
A properly closed mouth gives you brightness, better pitch, and a naturally balanced scale without excessive manipulation.
Moisture: The Invisible Variable
Cane is hygroscopic. It absorbs and releases moisture constantly.
That’s actually good while playing – moisture helps the cane vibrate more freely and produce a thicker sound. But outside of playing, it creates instability.
Dry climates (or dry winter air indoors) can harden reeds quickly. Leave your pipes out overnight, and the reed may feel completely different the next day.
Even during competitions, moisture consistency matters. Before modern moisture control systems, bands would tune perfectly one evening and sound completely different the next morning.
The reed didn’t “go bad.” The environment changed.
Why Reeds Aren’t Batch-Manufactured Products
When a maker produces a batch, the cane largely determines the final spread of strengths. If the material yields twenty strong reeds, that’s what you’ll get. You can sand and adjust – but you’re still working within the cane’s personality.
You're not buying a manufactured product with guaranteed specifications; you're buying a handcrafted item made from agricultural material.
Sometimes you'll get a crackerjack reed that plays perfectly with minimal adjustment. Sometimes you'll need to invest time training the reed to perform.
And occasionally, despite everyone's best efforts, a reed just won't cooperate.
That's the art and science of reed making: equal parts precision engineering, material science, and acceptance of nature's variability.
Learn more about reeds in this in-depth discussion with legendary piper and master reed-maker, Adrian Melvin.
Stay connected - subscribe to our free Weekly Digest!
Get bagpipe knowledge delivered to you every Monday! Tips and tricks, podcasts, special offers, and more.
We hate SPAM. We will never sell your information, for any reason.